
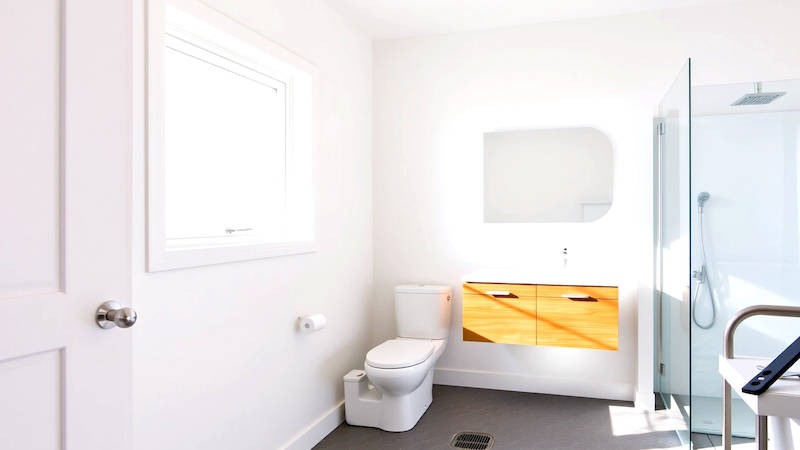
How to Convert a Bathtub into a Walk-In Shower Safely
The bathroom, often a sanctuary within our homes, needs to adapt to our changing needs. For many homeowners, particularly those aging in place or facing mobility challenges, a traditional bathtub presents a significant safety hazard. Stepping over the high sides of a tub requires balance and flexibility that diminishes with age, leading to a surprisingly high number of bathroom falls. Converting a bathtub into a walk-in shower offers a compelling solution – increasing safety, enhancing accessibility, and even adding to the resale value of your home. However, this isn’t a simple DIY project. It requires careful planning, adherence to building codes, and a thorough understanding of plumbing and waterproofing. This comprehensive guide will walk you through the process, focusing on safety, practical considerations, and whether a DIY approach is truly feasible.
This conversion addresses a growing need, as the population ages. According to the CDC, falls are the leading cause of injury and death from injury among older Americans, and nearly 80% of these falls occur in the home, with the bathroom being a particularly risky area. Beyond age-related concerns, injuries, arthritis, and other physical limitations can make using a bathtub difficult for people of all ages. A walk-in shower offers a more user-friendly and secure bathing experience. It also provides an opportunity to modernize the bathroom, potentially enhancing its aesthetic appeal and functionality. This guide aims to equip you with the knowledge to make an informed decision and, if you choose to proceed, to execute the conversion safely and successfully.
- Assessing Your Bathroom and Planning the Conversion
- Demolition and Subfloor Preparation: Laying the Foundation for Success
- Plumbing Modifications: Ensuring Proper Drainage and Water Supply
- Waterproofing and Shower Base/Pan Installation: Preventing Leaks and Damage
- Tiling, Fixture Installation, and Finishing Touches: Bringing Your Vision to Life
- Conclusion: Enjoying Your Safe and Accessible Walk-In Shower
Assessing Your Bathroom and Planning the Conversion
Before you even consider picking up a hammer, a detailed assessment of your bathroom is crucial. This involves evaluating the existing plumbing, the bathroom’s layout, and its structural integrity. Consider the size of your bathroom; a cramped space will require more careful planning to ensure the walk-in shower doesn't make the room feel even smaller. Furthermore, check local building codes and permit requirements. Many jurisdictions require permits for plumbing and structural changes, and failing to obtain necessary approvals can lead to fines and demands for remediation. This initial stage is not simply about measuring; it’s about anticipating potential challenges and formulating solutions before they become costly problems.
Beyond the physical space, think about the type of walk-in shower you envision. Do you prefer a curbless design for maximum accessibility, or a shower with a low threshold? Will you opt for a pre-fabricated shower base or a custom-tiled floor? The choice will impact the complexity of the installation and the overall cost. Creating a detailed blueprint, even a simple sketch, is highly recommended. This blueprint should include the dimensions of the new shower area, the placement of the shower head, controls, and any seating. Don't forget to consider drainage; proper slope is essential to prevent water accumulation and potential damage to your subfloor. A well-defined plan ensures a smoother, more efficient, and safer conversion process.
Finally, carefully evaluate your DIY skillset. Are you comfortable with plumbing, tiling, and potentially electrical work? If not, hiring qualified professionals is strongly recommended, particularly for tasks involving water supply and drainage. As stated by the National Kitchen & Bath Association (NKBA), “Bathroom renovations are consistently ranked as one of the most complex home improvement projects, requiring skilled tradespeople at various stages.” Attempting complex tasks without the necessary expertise can lead to leaks, structural damage, and safety hazards.
Demolition and Subfloor Preparation: Laying the Foundation for Success
Once you have a solid plan and the necessary permits (if required), the demolition phase can begin. This involves carefully removing the bathtub, surrounding tile, and any associated fixtures. Protecting adjacent surfaces, such as floors and walls, is paramount during demolition. Cover them with drop cloths or plastic sheeting to prevent damage. When removing the bathtub, be mindful of the weight. While acrylic tubs are relatively lightweight, cast iron tubs can be extremely heavy and may require assistance. Disconnecting the plumbing should be done cautiously to avoid water damage. Turn off the water supply to the bathroom before disconnecting any pipes.
Next comes the crucial step of subfloor preparation. This is arguably the most critical part of the entire conversion. The subfloor must be level, stable, and capable of supporting the weight of the new shower. Inspect the subfloor for signs of rot, water damage, or weakness. Any damaged areas must be repaired or replaced before proceeding. Depending on the condition of your existing subfloor, you may need to add additional support joists or install a new plywood underlayment. Ensuring a solid and level subfloor is essential for preventing cracks and leaks in the future. Proper waterproofing is also vital at this stage. Consider applying a waterproof membrane to the subfloor to protect it from moisture.
A common mistake homeowners make is underestimating the importance of proper subfloor preparation. This leads to issues like uneven flooring, tile cracking, and ultimately, costly repairs. Taking the time to get this step right will pay dividends in the long run. Look for signs of existing leaks – water stains on the ceiling below the bathroom are a red flag.
Plumbing Modifications: Ensuring Proper Drainage and Water Supply
Converting a bathtub into a walk-in shower invariably requires modifications to the existing plumbing. The most significant change is often altering the drain location and ensuring adequate slope for proper water drainage. You'll need to transition from the bathtub’s drain position to a linear drain (common in curbless showers) or a standard shower drain. This may involve cutting and rerouting drain pipes, which requires experience with PVC or copper plumbing. Soldering or gluing pipes incorrectly can lead to leaks, so precision is essential.
Beyond the drain, you'll need to configure the water supply for the shower head and controls. This typically involves extending existing water lines or installing new ones. Consider the type of shower valve you'll be using; pressure-balancing valves are recommended for maintaining consistent water temperature, even if someone flushes a toilet or runs water elsewhere in the house. It’s also important to adhere to local plumbing codes regarding pipe size, material, and connection methods. A pressure test should always be conducted after completing the plumbing modifications to ensure there are no leaks.
Remember, improper plumbing work can cause significant water damage and potentially compromise the structural integrity of your home. If you're not confident in your plumbing skills, it's best to hire a licensed plumber to handle this aspect of the conversion. They have the expertise to ensure the plumbing is installed correctly and meets all relevant code requirements. A small investment in professional plumbing can prevent major headaches down the road.
Waterproofing and Shower Base/Pan Installation: Preventing Leaks and Damage
Waterproofing is absolutely critical to the success of a walk-in shower conversion. Unlike a bathtub, which forms a complete waterproof enclosure, a walk-in shower relies heavily on a meticulously applied waterproofing system to prevent water from penetrating the subfloor and surrounding walls. This typically involves applying a liquid membrane or installing a sheet membrane over the entire shower area, including the walls, floor, and any niches or benches. Pay particularly close attention to corners and seams, as these are common areas for leaks to develop.
The installation of the shower base or pan is the next key step. If you've chosen a pre-fabricated shower base, ensure it’s level and securely attached to the subfloor. If you're opting for a custom-tiled shower floor, a waterproof shower pan must be constructed using a mortar bed and waterproof membrane. This involves creating a sloped surface that directs water towards the drain. The slope should be consistent and gradual, typically around ¼ inch per foot. A properly installed shower pan is the primary defense against water damage.
According to a report by the American Society of Home Inspectors, water damage is one of the most common and costly problems found during home inspections. Poor waterproofing is frequently cited as the root cause. Employing high-quality waterproofing materials and following the manufacturer's instructions meticulously are essential for a long-lasting and leak-free shower.
Tiling, Fixture Installation, and Finishing Touches: Bringing Your Vision to Life
With the plumbing and waterproofing completed, the aesthetic aspects of the conversion can take center stage. Tiling the shower walls and floor offers a wide range of design possibilities. Choose tiles that are durable, water-resistant, and slip-resistant. Proper tile installation is crucial to prevent cracks and leaks. Use a high-quality thin-set mortar and grout, and follow the manufacturer’s instructions regarding application and curing times. Ensuring the tiling is done correctly is also part of a good waterproofing system.
Once the tile is installed, you can proceed with installing the shower fixtures, including the shower head, controls, and any accessories like grab bars or shelving. Connect the fixtures to the water supply lines and test them for leaks. Finally, add the finishing touches, such as caulk around the edges of the shower and install a shower door or curtain (if desired). Pay attention to detail and ensure all seams and joints are properly sealed to prevent water penetration.
Accessibility considerations should be prioritized during fixture selection. Install grab bars near the shower entry and inside the shower area, particularly for individuals with mobility challenges. Consider a handheld shower head with an adjustable height for added convenience. The final result should not only be aesthetically pleasing but also safe and functional for all users.
Conclusion: Enjoying Your Safe and Accessible Walk-In Shower
Converting a bathtub into a walk-in shower is a significant home improvement project that can dramatically improve safety, accessibility, and the overall enjoyment of your bathroom. However, it's a project that requires careful planning, meticulous execution, and a realistic assessment of your DIY skills. While some homeowners may be capable of handling certain aspects of the conversion themselves, others may benefit from hiring qualified professionals for plumbing, electrical, and tiling work. Remember, prioritizing safety and adhering to building codes are paramount throughout the process.
The key takeaways are to thoroughly assess your bathroom, prepare the subfloor meticulously, pay unwavering attention to waterproofing, and ensure proper plumbing connections. By following these guidelines, you can transform your dated bathtub into a modern, safe, and accessible walk-in shower that will enhance your home for years to come. The initial investment may seem substantial, but the increased safety, convenience, and potential increase in home value make it a worthwhile undertaking. Don't hesitate to seek expert advice when needed and prioritize quality materials and workmanship for a long-lasting and leak-free result.
Deja una respuesta