
Step-by-Step Guide to Installing Smart Security Cameras with Mobile Alerts
The rise of smart home technology has dramatically altered the landscape of home security. Where once elaborate, professionally installed systems were the only viable option, now homeowners can easily – and affordably – bolster their defenses with smart security cameras. These devices, often controlled via smartphone apps, offer real-time monitoring, motion detection, and vital mobile alerts, providing peace of mind whether you’re at work, on vacation, or simply relaxing in another room. But simply buying cameras isn’t enough. Proper installation and configuration are crucial to maximize their effectiveness and ensure your home is truly protected.
This comprehensive guide will walk you through every step of installing smart security cameras, from selecting the right models to configuring mobile alerts. We’ll cover the essential tools, address common installation challenges, and explore advanced setup options to tailor your security system to your specific needs. According to a recent report by Statista, the smart home security market is projected to reach $18.35 billion in 2024, signifying a growing demand for these types of solutions. This guide aims to empower you to be a part of this revolution, taking control of your home’s safety and security.
- Choosing the Right Smart Security Camera
- Gathering Necessary Tools and Materials
- Step-by-Step Installation of Wired Cameras
- Step-by-Step Installation of Wireless Cameras
- Configuring Mobile Alerts and Notifications
- Troubleshooting Common Installation Issues
- Conclusion: Protecting Your Home with Smart Security
Choosing the Right Smart Security Camera
Selecting the appropriate camera is the foundation of a successful smart home security setup. The market is flooded with options, each offering a unique set of features and price points. Factors to consider include indoor versus outdoor use, wired versus wireless connectivity, resolution (720p, 1080p, 2K, 4K), field of view, night vision capabilities, and whether the camera requires a subscription for cloud storage. Budget plays a key role, but don’t skimp on essential features, particularly if you’re prioritizing outdoor use and vandal resistance. Cameras from established brands like Arlo, Ring, Google Nest, and Wyze consistently rate highly for performance and reliability, but numerous other viable options exist.
Beyond the core specifications, consider the ecosystem the camera integrates with. If you're already invested in a particular smart home platform (like Amazon Alexa or Google Assistant), choosing cameras that seamlessly integrate with that platform will simplify control and automation possibilities. Wireless cameras offer flexibility in placement but rely on a stable Wi-Fi connection; wired cameras, while less flexible, provide a more reliable connection and generally avoid the image quality degradation that can occur with weaker Wi-Fi signals. For example, a homeowner with a large property might opt for a combination of wired and wireless cameras – wired units for critical areas like the front door, and wireless options to cover wider areas of the yard.
Finally, research the privacy features offered by each camera. Look for cameras with features like two-factor authentication, end-to-end encryption, and the ability to disable remote access if desired. The Electronic Frontier Foundation (EFF) offers valuable insights and reviews regarding the privacy implications of various smart home devices, providing a useful resource for informed decision-making.
Gathering Necessary Tools and Materials
Before you begin the installation process, ensuring you have all the necessary tools and materials is critical for a smooth and efficient setup. This preparatory step will save you time and frustration in the long run. The specific tools required will vary depending on the type of camera and the mounting location, but a general checklist includes a drill with appropriate drill bits (for mounting), a screwdriver set (Phillips and flathead), a ladder (for outdoor cameras), wire strippers (for wired cameras), a cable tester (also for wired cameras), and a level to ensure cameras are mounted straight.
Beyond tools, you'll need mounting hardware, which may be included with the camera or require separate purchase. This typically consists of screws, anchors, mounting brackets, and potentially weatherproofing materials for outdoor installations. For wireless cameras, have your Wi-Fi password readily available, as well as a smartphone or tablet for initial configuration. Consider purchasing and having on hand a few extra feet of ethernet cable for any wired cameras – unexpected cable length issues can occur. Additionally, a voltage tester is crucial if you’re connecting cameras to existing electrical outlets.
Don't overlook safety gear! Wearing safety glasses while drilling and working with electrical components is crucial to protect your eyes. Gloves can provide a better grip and protect your hands, especially when dealing with outdoor installations in potentially harsh weather conditions.
Step-by-Step Installation of Wired Cameras
Installing wired cameras requires a bit more technical proficiency than wireless options, but the resulting reliability is often worth the effort. Begin by identifying a power source and a suitable location for the camera, keeping in mind field of view and potential obstructions. Run the necessary cables (power and Ethernet) from the camera location to a central networking hub, such as a router or network switch. Cable management is crucial – concealing cables within walls or using cable conduits will provide a cleaner, more professional appearance and protect the wires from damage.
Once the cables are in place, mount the camera securely using the provided hardware. Ensure the camera is level and firmly attached to prevent movement. Connect the power and Ethernet cables to the camera, and then connect the other end of the Ethernet cable to your router or switch. Power on the camera and follow the manufacturer’s instructions to configure it on your network. This typically involves downloading a mobile app, scanning a QR code on the camera, and entering your Wi-Fi credentials. Remember to test the camera’s functionality, including motion detection and recording, to ensure it's working correctly. For instance, if installing on a garage, test functionality with a slow controlled movement out of camera view to ensure responsiveness.
Step-by-Step Installation of Wireless Cameras
Wireless camera installation is generally simpler, but still requires careful planning. First, charge the camera battery fully (if applicable). Then, using the manufacturer's mobile app, connect the camera to your home Wi-Fi network. This usually involves scanning a QR code on the camera and entering your Wi-Fi password. Once connected, the app will guide you through the setup process, which typically includes naming the camera, setting up motion detection zones, and configuring recording preferences.
Mount the camera in your desired location, using the provided mounting hardware. Ensure the camera is within range of your Wi-Fi network and has a clear view of the area you want to monitor. Pay close attention to the signal strength indicator in the mobile app; if the signal is weak, consider moving the camera closer to your router or adding a Wi-Fi range extender. Outdoor wireless cameras should be positioned under eaves or in other sheltered locations to protect them from the elements. Consider a wall mount, or other stable structure, to minimize potential camera sway.
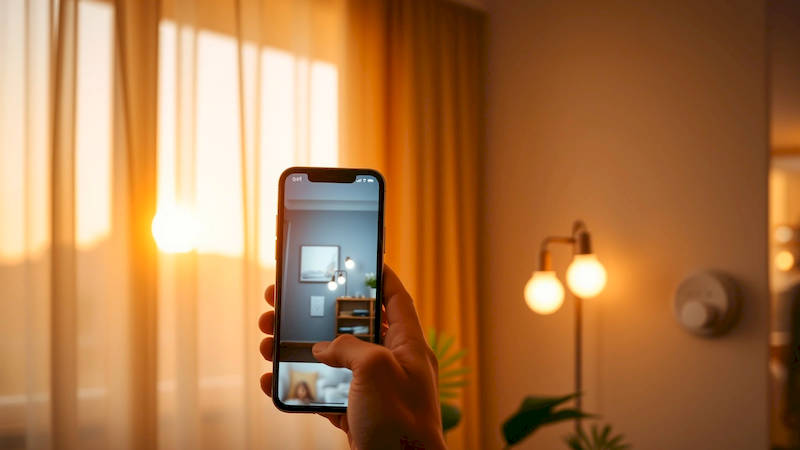
Configuring Mobile Alerts and Notifications
Once your cameras are installed and connected, configuring mobile alerts is essential for real-time monitoring. Most smart security camera apps allow you to customize alert settings based on motion detection, person detection (some cameras), sound detection, and even package detection. Experiment with different sensitivity levels to minimize false alarms caused by things like trees swaying in the wind or passing cars.
Create specific activity zones within the camera's field of view to focus alerts on areas of importance, such as your driveway or front door. This helps reduce unnecessary notifications and improves the accuracy of motion detection. Most apps also allow you to schedule alerts, so you only receive notifications during certain times of day. For example, you might want to enable alerts only when you’re away from home or during nighttime hours. Consider enabling two-factor authentication within your camera's app for increased account security.
Troubleshooting Common Installation Issues
Even with careful planning, you may encounter some common installation issues. One frequent problem is a weak Wi-Fi signal, which can cause intermittent connectivity or poor video quality. To address this, try repositioning the camera, adding a Wi-Fi range extender, or upgrading your router. If a camera won’t connect to your network, double-check your Wi-Fi password and ensure the camera is within range.
Another potential issue is false alarms. Adjusting motion detection sensitivity, creating activity zones, and filtering alerts can significantly reduce these. For wired cameras, connectivity issues may be caused by damaged cables or faulty network ports. Use a cable tester to diagnose cable problems and ensure all connections are secure. Finally, if you’re experiencing problems with the mobile app, try updating it to the latest version or reinstalling it.
Conclusion: Protecting Your Home with Smart Security
Installing smart security cameras with mobile alerts is a valuable investment in your home’s safety and security. By carefully selecting the right cameras, gathering the necessary tools, and following the step-by-step installation procedures outlined in this guide, you can create a robust security system that provides peace of mind. Remember that proper configuration of mobile alerts is just as important as the installation itself; tailor the settings to your specific needs and preferences to maximize the system’s effectiveness.
The integration of smart home technology continues to evolve, offering ever more sophisticated security features. Don't hesitate to explore advanced options like cloud storage, professional monitoring, and integration with other smart home devices. Ultimately, taking proactive steps to secure your home empowers you to protect your family and possessions. Regular system checks, firmware updates, and a consistent review of your security settings will ensure your smart security cameras continue to provide reliable protection for years to come.
Deja una respuesta