
Building a Soundproof Basement Music Studio
The dream of a dedicated music space, free from the constraints of shared living, is a powerful motivator for many musicians. While attics offer potential, basements are often the ideal location for a home recording studio due to their inherent isolation from street noise and the ability to minimize disturbance to others. However, a basement’s inherent qualities aren’t always enough. Achieving true soundproofing – preventing sound from entering and leaving the space – requires careful planning and execution. This guide will provide a comprehensive, step-by-step approach to building a soundproof basement music studio, covering everything from initial considerations to final acoustic treatment.
Many aspiring musicians underestimate the complexity of soundproofing versus sound dampening. Dampening reduces echoes within a room (acoustic treatment handles this), while proofing prevents sound transmission through walls, floors, and ceilings. Building codes, often centered around noise ordinances, also play a crucial role, and neglecting compliance can lead to legal issues. Additionally, a poorly soundproofed studio isn’t just an annoyance to neighbors; it compromises the quality of recordings, introducing unwanted noise and reflections. A successful project necessitates a holistic approach, addressing every potential pathway for sound.
- Assessing Your Basement & Planning the Layout
- Decoupling: The Foundation of Soundproofing
- Addressing Sound Transmission Pathways: Walls, Floors & Ceilings
- Doors & Windows: The Weakest Links
- Acoustic Treatment: Optimizing Sound Within the Studio
- Ventilation & Electrical Considerations
- Conclusion: Bringing Your Soundproof Studio to Life
Assessing Your Basement & Planning the Layout
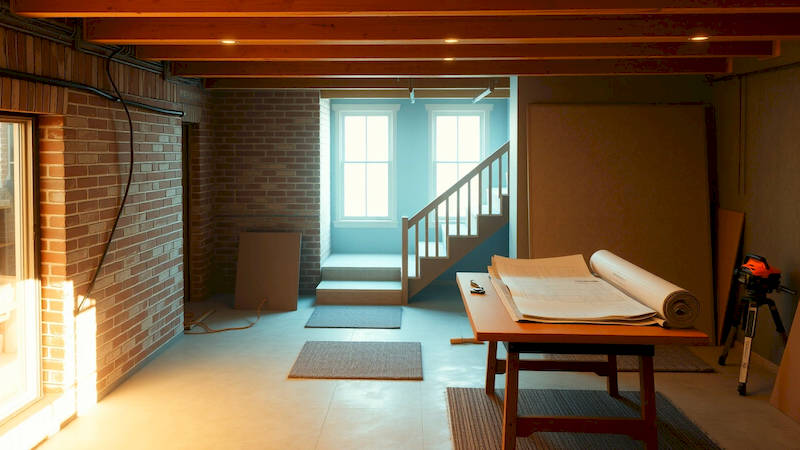
Before even thinking about materials, a thorough assessment of your basement is critical. Start by identifying existing weaknesses – windows, doors, vents, plumbing penetrations, and particularly, connection points between the basement walls and the foundation. These are prime culprits for sound leakage. Consider the existing floor joists and ceiling height. Low ceilings will limit your acoustic treatment options, and weak floors will require significant reinforcement. The layout of your studio within the basement must prioritize isolation. Aim to create a “room within a room” concept, completely decoupling your studio space from the core structure whenever possible.
Next, plan the studio's function. Will it be solely for recording, mixing, practicing, or a combination? This dictates the necessary space and equipment. A dedicated vocal booth requires less space than a full drum kit setup. Sketch out several layout options, considering workflow, instrument placement, and acoustic treatment zones. Remember to leave ample space around equipment for ventilation and access. Consider the location of electrical outlets and ensure you have sufficient power capacity for your setup, addressing potential grounding issues specific to basement environments which can introduce noise into recordings.
Finally, research local building codes and permit requirements. Soundproofing modifications might necessitate permits, especially if you’re altering structural elements. Ignoring these regulations can lead to fines and rework. Engaging a qualified contractor experienced in soundproofing can be invaluable at this stage, providing guidance on code compliance and best practices.
Decoupling: The Foundation of Soundproofing
Decoupling is arguably the most important principle in soundproofing. It involves physically separating the studio structure from the existing basement structure, minimizing the transmission of vibrations. This isn't about stuffing gaps with foam; it’s about creating independent frameworks. One common technique is building a floating floor. This involves constructing a new floor above the existing concrete slab using resilient channels and damping materials to absorb vibrations. The new floor should not be directly attached to the walls.
Another crucial aspect of decoupling is building independent walls. Instead of attaching drywall directly to the existing basement walls, construct a new wall frame slightly spaced away from the original. Fill the cavity between the frames with high-density insulation like mineral wool or fiberglass. This creates an air gap and significantly reduces sound transmission. Avoid direct connections between the new and old walls – use resilient channels on the studs to further isolate them. According to research by acoustics experts at Heracoustic, “Decoupling reduces flanking transmission by up to 90%”, emphasizing its vital role in effective soundproofing.
Lastly, address the ceiling. Similar to the floor, a suspended ceiling – created with resilient channels and acoustic tiles – provides isolation. A double-layered drywall ceiling with damping compound applied between layers is also effective if headroom isn't a concern. Remember, eliminating structural connections across all surfaces is the key.
Addressing Sound Transmission Pathways: Walls, Floors & Ceilings
Once the decoupling framework is in place, focus on maximizing the Sound Transmission Class (STC) rating of your walls, floor, and ceiling. STC measures a structure's ability to resist airborne sound transmission. Higher STC values indicate greater sound isolation. For a serious music studio, aiming for an STC of 50 or higher is advisable. The choice of materials is crucial. Denser materials – like mass-loaded vinyl (MLV), multiple layers of drywall, and concrete – provide better sound blocking.
For walls, consider layering drywall with a damping compound like Green Glue between layers. This material converts sound energy into heat, effectively reducing vibrations. Seal every gap and crack with acoustic sealant, including around electrical outlets and ventilation openings. Regarding the floor, add a layer of MLV under the finished flooring material (carpet or wood flooring) to further dampen vibrations. In addition to the floating floor, ensure any pipes or wires that penetrate the floor are sealed with acoustic putty.
The ceiling requires similar attention. Using multiple layers of drywall with Green Glue, combined with a resilient channel system, can significantly increase the ceiling’s STC rating. Pay close attention to any recessed lighting fixtures, sealing around them to prevent sound leakage. Remember, even small gaps can undermine the effectiveness of your soundproofing efforts. A comprehensive approach that addresses every potential pathway is essential.
Doors & Windows: The Weakest Links
Doors and windows are notoriously difficult to soundproof, as they are often the weakest links in any soundproofing scheme. Standard hollow-core doors provide minimal sound isolation. Replace your existing door with a solid-core wood or metal door, ensuring a tight seal around the frame. Add weather stripping around the entire perimeter of the door to eliminate air gaps. A specialized soundproof door, while expensive, offers the highest level of sound isolation.
Windows pose an even greater challenge. Single-pane windows offer virtually no soundproofing. Consider replacing them with double-pane or triple-pane windows with laminated glass. Adding a secondary window – an interior window frame placed in front of the existing window – creates an additional air gap and drastically improves sound isolation. Heavy curtains or soundproof blankets can provide an extra layer of damping, but they shouldn’t be relied upon as a primary soundproofing solution. Furthermore, any gaps around the window frame must be meticulously sealed with acoustic sealant.
Acoustic Treatment: Optimizing Sound Within the Studio
Soundproofing prevents sound from entering or leaving; acoustic treatment improves the sound within the studio. Once the structure is soundproofed, focus on controlling reflections and reverberation. This involves using acoustic panels, bass traps, diffusers, and other materials to absorb or scatter sound waves. Acoustic panels, typically made of fabric-wrapped fiberglass or mineral wool, are placed strategically on walls and ceilings to absorb mid and high-frequency sounds.
Bass traps, often placed in corners, are designed to absorb low-frequency sounds, preventing them from building up and creating muddiness. Diffusers scatter sound waves, creating a more natural and spacious sound. The placement and quantity of acoustic treatment depend on the size and shape of your studio, as well as the type of music you’ll be recording or mixing. A common approach involves using the “mirror trick” - having an assistant move a mirror along the walls. Anywhere you can see the speakers in the mirror from the mixing position indicates a reflection point that requires treatment.
Ventilation & Electrical Considerations
Soundproofing a basement studio inevitably involves sealing up many openings, which can impact ventilation and electrical access. Poor ventilation can lead to moisture buildup and uncomfortable working conditions. Install a dedicated ventilation system with baffled air ducts to allow for fresh air exchange without compromising sound isolation. These ducts should be lined with acoustic insulation and strategically routed to minimize sound leakage.
Electrical wiring should be run through conduit and sealed with acoustic putty where it passes through walls or ceilings. Ensure your electrical panel has sufficient capacity to handle the demands of your studio equipment. Grounding is crucial to prevent unwanted noise and interference in your recordings. Consider using a dedicated circuit for your audio equipment and a power conditioner to filter out noise from the power supply. A professional electrician specializing in audio installations can provide valuable guidance.
Conclusion: Bringing Your Soundproof Studio to Life
Building a soundproof basement music studio is a significant undertaking, demanding careful planning, diligent execution, and a substantial investment of time and resources. However, the rewards – a dedicated, isolated space for creative expression – are well worth the effort. Remember that decoupling is the cornerstone of soundproofing, and addressing every potential sound transmission pathway is critical. Don't underestimate the importance of acoustic treatment, which is vital for achieving professional-quality recordings.
Key takeaways include prioritizing decoupling, using high-density materials, meticulously sealing all gaps, and investing in appropriate acoustic treatment. Before embarking on this project, thoroughly research local building codes and consider consulting with experienced professionals. By following these guidelines, you can transform your basement into a sanctuary for music, free from the distractions and constraints of the outside world, and capable of producing recordings that truly shine. Your next step should be to create a detailed project plan with a realistic budget, and assemble a team of skilled contractors if necessary – a well-planned project guarantees a successful, sonically isolated studio space.
Deja una respuesta