
Optimal Storage Techniques for Glass Jars and Bottles
The kitchen pantry and cabinets often become the unsung battlegrounds of home organization. While aesthetics are important, truly effective organization goes beyond simply making things look neat; it's about creating a system that’s both functional and visually appealing, maximizing space and minimizing wasted effort. Glass jars and bottles, frequently accumulated from purchased goods, represent a huge potential for streamlined storage. However, simply piling them up isn’t a solution – it’s a recipe for chaos. Mastering techniques to store these items effectively can dramatically improve the usability of your kitchen, reduce food waste, and even elevate your kitchen’s aesthetic appeal. This article delves into the world of glass jar and bottle storage, providing a comprehensive guide to techniques that will transform your pantry from a source of frustration to a haven of order.
The allure of glass storage extends beyond mere practicality. Unlike plastic containers, glass doesn’t absorb odors, stains, or flavors, making it ideal for preserving the freshness of everything from spices to dry goods. It’s also a more environmentally friendly option – reusable and endlessly recyclable. However, their weight and potential for breakage require thoughtful storage solutions. This guide aims to cover everything from initial assessment and cleaning to space-saving techniques and display options, ensuring your glass collection becomes an asset, not an obstacle, in your kitchen.
- Assessing and Preparing Your Glassware Collection
- Maximizing Vertical Space: Shelving and Risers
- Utilize Door Space and Wall-Mounted Solutions
- Lid Organization: A Critical Component
- Displaying Glassware: Elevating Aesthetics
- Beyond the Pantry: Alternative Storage Locations
- Conclusion: A Sustainable System for a Streamlined Kitchen
Assessing and Preparing Your Glassware Collection
Before diving into storage solutions, a thorough assessment of your glassware collection is crucial. This involves taking inventory, culling unnecessary items and properly preparing everything for optimized storage. Begin by removing all glass jars and bottles from your pantry and cabinets. Spread them out on a large surface – a kitchen table or countertop works well – to get a clear visual overview of what you have. This initial step often reveals duplicates or items you’ve completely forgotten about, which is the first step towards decluttering.
Next, categorize your glassware based on size, shape, and intended use. Separate jars by mouth size (wide-mouth, standard-mouth) as this will influence lid compatibility and storage options. Group bottles by height and shape, differentiating between standard beverage bottles, sauce bottles, and more specialized containers like olive oil or vinegar bottles. Simultaneously, discard any broken or chipped items; these pose a safety hazard and aren’t worth keeping. Finally, label any unmarked jars or bottles with their contents to avoid future confusion – a simple masking tape label and permanent marker will suffice initially.
Preparing the glassware for storage involves a thorough cleaning. Even if a jar appears clean, residue can attract pests or impart off-flavors to stored items. Wash all jars and bottles in hot, soapy water, paying particular attention to the rims and bases. For stubborn residue, a paste of baking soda and water can work wonders. Ensure all items are completely dry before storing – moisture can lead to mold growth. According to a study by the Container Recycling Institute, proper cleaning extends the life of glass containers and makes them more readily recyclable if you ever choose to dispose of them.
Maximizing Vertical Space: Shelving and Risers
One of the biggest challenges with glass jar and bottle storage is their tendency to gobble up valuable shelf space. Their varied shapes and sizes often leave awkward gaps, leading to inefficiency. The solution? Embrace verticality. Adjustable shelving is your best friend. Configure shelves to accommodate the height of your tallest bottles, then add smaller risers or shelf dividers to create tiered storage for shorter jars. This maximizes the usable height of each shelf and prevents items from being hidden behind others.
Risers, available in materials like metal, plastic, or bamboo, create different levels within the same shelf, allowing you to see all your jars at a glance. Tiered spice racks, originally designed for spice jars, are incredibly versatile and can be repurposed for other small jars. Furthermore, consider utilizing the space under shelves. Adhesive-backed wire baskets can be attached to the underside of shelves to create additional storage for small jars or lids.
For particularly tall bottles, like wine bottles, investing in specific wine racks or utilizing adjustable shelf heights are essential. Don’t be afraid to rearrange shelves frequently to adapt to your evolving inventory. A well-organized kitchen pantry isn't static; it's a dynamic space that should be adjusted as needed. “The key to long-term pantry organization is flexibility,” says professional organizer Marie Kondo, author of The Life-Changing Magic of Tidying Up. “Regularly evaluate what you’re using and adjust your system accordingly.”
Utilize Door Space and Wall-Mounted Solutions
Don’t limit your storage thinking to the interior of your cabinets and pantry. Doors and walls represent untapped storage potential. Door-mounted racks, designed for spices or small jars, are a game-changer for narrow kitchens. These racks provide easy access to frequently used items and free up valuable shelf space. Look for adjustable racks that can accommodate different jar sizes.
Wall-mounted shelving units, even narrow ones, can be perfect for displaying attractive glass bottles or storing backup jars. Floating shelves offer a clean, modern look and can be customized to fit your specific needs. Consider using magnetic spice racks – these adhere to the side of your refrigerator or metal backsplash, keeping spices and small jars within easy reach.
When using door-mounted or wall-mounted solutions, always prioritize safety. Ensure the racks or shelves are securely attached to the door or wall, and avoid storing excessively heavy items on door-mounted racks, as this can strain the hinges. A practical tip: test the weight capacity of the rack before loading it up with jars.
Lid Organization: A Critical Component
Often overlooked, lid organization is arguably the most frustrating aspect of glass jar storage. A disorganized collection of lids can turn a perfectly organized pantry into a chaotic mess. Several solutions exist, ranging from dedicated lid organizers to DIY hacks. Dedicated lid organizers, typically made of plastic or metal, feature slots or dividers designed to hold lids in place. These are available in various sizes and configurations to accommodate different lid diameters.
Alternatively, you can create a DIY lid organizer using repurposed materials like cardboard boxes or plastic containers. Cut slits in the cardboard to hold lids upright, or use small plastic containers to separate lids by size. Another clever hack involves using hair ties or rubber bands to secure lids together, preventing them from rolling around.
Regardless of the method you choose, the key is to keep lids readily accessible and matched to their corresponding jars. Consider storing lids with the jars whenever possible, either by nesting them inside the jar or attaching them with a rubber band. This saves time and frustration when you need to access the contents.
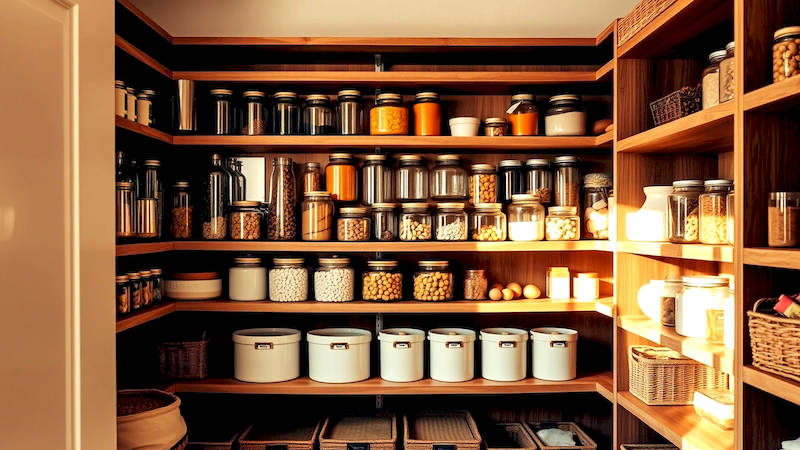
Displaying Glassware: Elevating Aesthetics
While functionality is paramount, glass jars and bottles can also be aesthetically pleasing. Consider displaying attractive jars and bottles on open shelving or in glass-front cabinets. This not only adds visual interest to your kitchen but also makes it easier to see what you have on hand. Use jars to store dry goods like pasta, rice, or lentils, creating a visually appealing and organized pantry display.
Grouping jars and bottles by color or shape can create a cohesive and stylish look. Incorporate natural elements like wooden labels or twine ties to add warmth and texture. Don't be afraid to experiment with different arrangements until you find one that suits your personal taste. However, remember to limit the display to items you actively use. Overcrowding can negate the visual appeal and make it difficult to access items.
Beyond the Pantry: Alternative Storage Locations
If pantry space is limited, consider utilizing alternative storage locations. Under-bed storage containers, particularly those with lids, can be an excellent option for storing backup jars or less frequently used bottles. A spare cabinet in the laundry room or dining room can also provide additional storage space. Even a dedicated corner in the basement or garage can be utilized – provided it's clean, dry, and pest-free.
When storing glassware in unconventional locations, prioritize safety. Wrap fragile items in bubble wrap or packing paper to prevent breakage during transport or storage. Clearly label all containers to indicate their contents. Remember to periodically check these alternative storage locations and rotate your inventory to ensure nothing is forgotten or expired.
Conclusion: A Sustainable System for a Streamlined Kitchen
Optimizing glass jar and bottle storage isn’t simply about aesthetics—it’s about creating a more functional, efficient, and sustainable kitchen. By taking the time to assess your collection, utilize vertical space, organize lids effectively, and consider alternative storage locations, you can transform a frustrating area of your home into a source of calm and order. Remember that the best system is one that’s tailored to your specific needs and lifestyle.
Key takeaways include the importance of decluttering, prioritizing vertical space via shelving and risers, and maintaining a readily available lid organization system. Implementing these techniques will not only improve the usability of your kitchen but also reduce food waste, promote sustainability by maximizing the use of reusable containers, and ultimately elevate the overall aesthetic appeal of your home. It's a process, not a destination. Review and refine your system regularly, and enjoy the peace of mind that comes with a well-organized kitchen.
Deja una respuesta