
Step-by-Step Guide to Decluttering Your Living Room Shelves
The living room often serves as the heart of the home – a space for relaxation, entertainment, and connection. For many, this central space quickly becomes a repository for everything but calm, particularly when shelving units become cluttered catch-alls. Overstuffed shelves contribute to visual noise, increase stress levels, and can even impact your overall sense of well-being. Studies show that clutter significantly impacts our ability to focus and process information; a Princeton University Neuroscience Institute study found that clutter competes for our attention, resulting in reduced efficiency and increased frustration. Decluttering isn’t simply about aesthetics; it's about creating a more peaceful and functional living environment. This guide provides a detailed, step-by-step approach to conquering your living room shelves and transforming them from sources of stress to displays of curated calm.
A cluttered living room reflects a cluttered mind, and the act of decluttering can be surprisingly therapeutic. Think of the process as a form of mindful editing, carefully considering what truly adds value to your life and what simply takes up valuable space. Facing the task can feel daunting, but breaking it down into manageable steps will make the process significantly less overwhelming. This isn’t about radical minimalism if that’s not your style, but rather about intentional living – ensuring everything on display serves a purpose or brings you genuine joy. The result? A living room that feels more inviting, organized, and representative of the life you want to live.
- Phase 1: The Great Shelf Purge – Initial Assessment and Removal
- Phase 2: Categorizing and Critical Evaluation – The "Keep" Pile
- Phase 3: The Donate, Trash, and Relocate Decisions – Letting Go
- Phase 4: Shelving Arrangement Strategies – Aesthetics and Functionality
- Phase 5: Maintaining the Order – Habit Formation & Prevention
Phase 1: The Great Shelf Purge – Initial Assessment and Removal
The first step, and arguably the most challenging, is complete removal. Resist the urge to simply rearrange items; this rarely leads to genuine decluttering. Instead, empty every shelf, placing all items in a designated area. This allows you to see the sheer volume of what you have and begin to assess objectively. To accomplish this effectively, gather large boxes or bins – label them clearly "Keep," "Donate," "Trash," and "Relocate." The ‘Relocate’ box is crucial; it's for items that don't belong on the shelves but need a home elsewhere in the house. This prevents simply shifting clutter from one spot to another.
Once everything is removed, take a moment to clean the shelves themselves. Dust thoroughly, and consider applying a furniture polish or protectant. A clean slate is incredibly motivating and makes the subsequent organization feel more rewarding. This is also a good time to assess the shelves themselves – are they still serving your needs? Could you benefit from adjustable shelves, additional shelving units, or a different configuration altogether? This initial assessment lays the groundwork for a functional and visually appealing outcome.
Finally, create a dedicated workspace near your shelving unit. Good lighting is essential, and having ample space to sort and categorize will significantly streamline the process. Put on some music you enjoy, inform your household that you’re embarking on this project (to minimize interruptions), and mentally prepare for a focused decluttering session. Remember, this is about creating a space you love, and the initial effort will be well worth the reward.
Phase 2: Categorizing and Critical Evaluation – The "Keep" Pile
Now comes the critical evaluation of your belongings. Begin with the "Keep" pile and further categorize items into meaningful groups: books, photographs, decorative objects, electronics, games, etc. This grouping will inform your organization strategy later. As you handle each item, ask yourself a set of crucial questions. Do I genuinely love this item? Have I used it in the past year? (Be honest!) Does it serve a practical purpose? Does it evoke positive memories or feelings? Is it irreplaceable?
The two-year rule is a helpful guideline: if you haven’t used an item in two years, it's likely you don’t need it. However, this isn't a hard and fast rule; sentimental items are an exception. However, even with sentimental items, consider whether you truly need to display them all. Could some be stored safely in a memory box? Expert organizers often recommend the "one in, one out" rule: every time you acquire a new item, you donate or discard an existing one – a habit that prevents future clutter buildup.
Don’t fall into the trap of keeping things “just in case.” While planning ahead is admirable, holding onto items for hypothetical future use often leads to unnecessary clutter. Consider the cost of storing an item versus the cost of replacing it if you eventually need it. Often, the storage cost (in terms of space and mental energy) outweighs the replacement cost. This crucial evaluation process, while demanding, is the core of successful decluttering.
Phase 3: The Donate, Trash, and Relocate Decisions – Letting Go
With the “Keep” pile refined, it’s time to tackle the remaining boxes. The “Donate” box should include items in good condition that you no longer need or use. Books you’ve already read and won’t revisit, decorative items that no longer suit your style, and functional objects you’ve replaced are all suitable candidates. Research local charities and donation centers to ensure your items will be put to good use. The Salvation Army, Goodwill, and local libraries are excellent options.
The “Trash” box should contain broken, damaged, or unusable items. This can be surprisingly painful, especially with sentimental objects. However, holding onto broken items only serves as a reminder of what’s lost. Be realistic and let them go. Consider responsible disposal options, such as recycling electronics or properly discarding hazardous materials.
The “Relocate” box is often the most overlooked but equally important. This is for items that don’t belong on your shelves, but need a home. A kitchen gadget, a child's toy, or a tool from the garage – these all belong elsewhere. Immediately take these items to their designated locations to prevent clutter from migrating back to your living room shelves. Procrastination is the enemy here; address these items promptly.
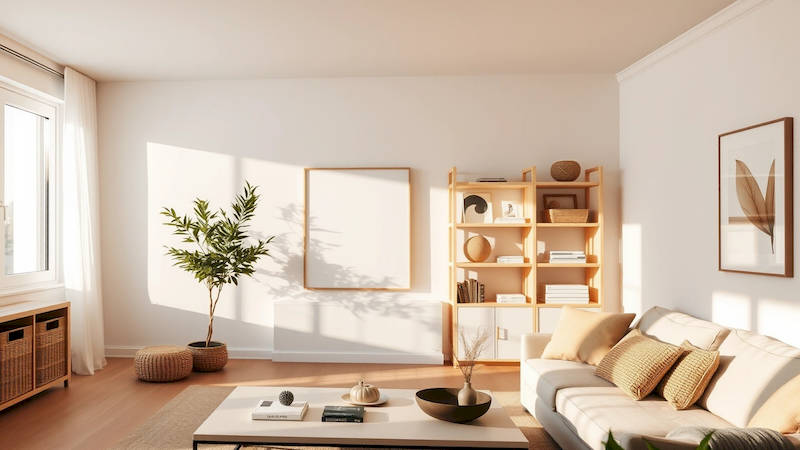
Phase 4: Shelving Arrangement Strategies – Aesthetics and Functionality
With the decluttering complete, it's time to arrange your "Keep" items on the shelves. Start with larger items, such as books or larger decorative objects, and work your way down to smaller items. Consider the principles of visual balance and create a cohesive aesthetic. Group items by color, size, or theme to create a more organized and pleasing look. The rule of thirds – a principle used in photography and art – can be applied to shelf styling. Arrange items in groupings of three, varying their heights and textures for visual interest.
Don’t be afraid to leave some negative space. Overcrowding shelves creates a cluttered look. Allowing items to breathe visually makes the space feel more open and inviting. Incorporate greenery, such as small potted plants, to add life and freshness. Vary textures and materials to create visual contrast. A mix of books, artwork, and decorative objects will create a more dynamic and engaging display. According to interior design expert Marie Kondo, organizing should focus on what "sparks joy" – arranging items that you truly love and appreciate.
Consider functional aspects as well. If you frequently use certain items, place them at eye level for easy access. If you have children, ensure potentially hazardous items are placed out of reach. Lighting can also play a crucial role. Add small spotlights or LED strips to highlight favorite objects and create a warm and inviting ambiance. Remember, the arrangement should reflect your personal style and enhance the overall aesthetic of your living room.
Phase 5: Maintaining the Order – Habit Formation & Prevention
Decluttering is not a one-time event; it's an ongoing process. To prevent your shelves from reverting to their cluttered state, establish sustainable habits. Regularly reassess your shelves – perhaps once a month or every quarter – to identify items that are no longer needed. Implement the “one in, one out” rule to prevent clutter from accumulating. Put items away immediately after use, rather than letting them pile up.
Consider a designated donation box or bag that you add to throughout the year. When it’s full, simply drop it off at your chosen charity. This makes donating a seamless part of your routine. Educate other members of your household about your organization system and encourage them to participate. Creating a shared understanding of clutter and its impact will foster a more organized and harmonious living environment.
Finally, remember that perfection is the enemy of progress. Don’t strive for magazine-worthy shelves; aim for functionality and a space that brings you joy. Minor imperfections are okay. The goal is to create a living room that supports your well-being and reflects your personal style.
In conclusion, decluttering your living room shelves is a transformative process that extends beyond mere aesthetics. It’s about creating a more peaceful, functional, and inviting space that supports your well-being. By systematically purging, categorizing, and arranging your belongings, you can reclaim your space and cultivate a sense of calm and order. Remember to prioritize intentionality, embrace the “one in, one out” rule, and establish sustainable habits to maintain the clutter-free environment you’ve worked so hard to achieve. The key takeaways are: complete removal and assessment, honest evaluation of belongings, and a commitment to ongoing maintenance. Start today – your living room, and your mind, will thank you for it.
Deja una respuesta