
Setting up multi-room voice-controlled lighting with Alexa and Google Assistant
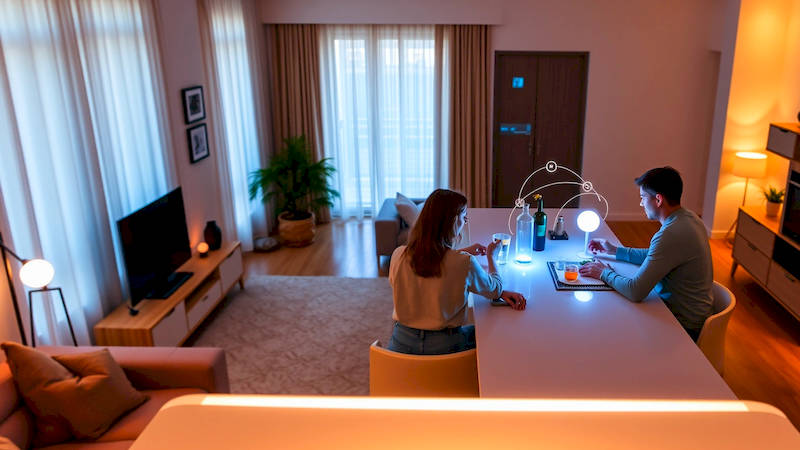
The dream of a truly smart home is often centered around convenience and ambiance. While individual smart devices have become increasingly commonplace, the real magic happens when they begin to work together, seamlessly responding to your voice and anticipating your needs. Among the most impactful and readily achievable integrations is multi-room voice-controlled lighting. Imagine walking into your home and saying, “Alexa, movie night,” and having the lights dim to a cozy level throughout the living room, hallway, and even the kitchen. Or, “Hey Google, good morning,” to gradually brighten lights across the house, mimicking a natural sunrise. This isn’t futuristic fantasy; it's remarkably achievable today.
This article will serve as your comprehensive guide to setting up multi-room voice-controlled lighting using either Amazon Alexa or Google Assistant. We’ll cover everything from choosing the right smart bulbs and hubs to configuring routines and troubleshooting common issues. The benefits extend beyond simple convenience. Smart lighting enhances security by simulating occupancy when you’re away, can improve mood and productivity, and even contribute to energy savings. As Statista reports, the smart lighting market is projected to reach $22.45 billion by 2028, clearly demonstrating the growing consumer demand for this technology.
- Understanding the Ecosystem: Bulbs, Hubs, and Voice Assistants
- Choosing the Right Smart Bulbs and Hub (If Needed)
- Setting Up Your Bulbs & Connecting to Alexa or Google Assistant
- Creating Rooms and Groups for Seamless Control
- Building Routines and Automation for Enhanced Convenience
- Troubleshooting Common Issues and Maximizing Performance
- Expanding Beyond Basics: Advanced Integrations & Future Trends
Understanding the Ecosystem: Bulbs, Hubs, and Voice Assistants
Before diving into setup, it's crucial to understand the core components. Smart bulbs themselves are the foundation. These come in various forms – standard A19 bulbs, BR30 spotlights, LED strips, and even decorative options. Compatibility is key; ensure your chosen bulbs work with Alexa or Google Assistant (many work with both!). Popular brands include Philips Hue, LIFX, Wyze, and Sengled. While some bulbs connect directly to Wi-Fi, others require a hub, which acts as a central communication point.
Hubs offer several advantages, particularly in larger homes. They create a dedicated smart home network (often Zigbee or Z-Wave) which reduces Wi-Fi congestion and improves responsiveness. Philips Hue’s Bridge is the industry standard, known for its reliability and extensive feature set. However, many bulbs now support direct Wi-Fi connection, eliminating the need for a hub, but potentially impacting network performance with numerous devices. Amazon Echo devices (like the Echo Show and Echo Dot) and Google Nest devices (like the Nest Hub and Nest Mini) serve as your voice assistants, interpreting commands and controlling the connected bulbs. “The initial cost of entry may seem higher with a hub-based system,” says smart home expert Stacey Higginbotham, “but the long-term benefits in terms of reliability and scalability are often worth it."
Choosing the Right Smart Bulbs and Hub (If Needed)
Selecting the right smart bulbs depends largely on your needs and budget. Wi-Fi bulbs are generally more affordable upfront but can strain your router, especially with many connected devices. Look for dual-band support (2.4 GHz and 5 GHz) in both the bulbs and your router for optimal performance. Consider the brightness (lumens), color temperature (warm white, cool white, daylight), and whether you want color-changing capabilities. If you’re building a more elaborate lighting system with scenes and automation, color-changing bulbs are a significant advantage.
If opting for a hub, research compatibility with your chosen bulbs and voice assistant. The Philips Hue Bridge support is extensive, but other hubs like Samsung SmartThings also work with a wide range of devices. Factor in the hub’s technical specifications like the wireless protocol it uses (Zigbee, Z-Wave, etc.) and its capacity for connected devices. Pay attention to reviews regarding the hub’s ease of setup and reliability. A poorly performing hub can negate the benefits of otherwise great smart bulbs. Consider the physical location of the hub; placement within a central location in your house for optimum signal reach is critical.
Setting Up Your Bulbs & Connecting to Alexa or Google Assistant
The initial setup process varies slightly depending on the bulbs and voice assistant you choose. Generally, you’ll start by installing the bulbs in your desired fixtures and then downloading the bulb manufacturer’s app (e.g., Philips Hue app, LIFX app). Within the app, you’ll connect the bulbs to your Wi-Fi network (or to the hub if you’re using one). Follow the app’s instructions carefully; this usually involves putting the bulb into pairing mode by turning it on and off a few times.
Once connected to the bulb manufacturer’s app, you'll need to link your account to Alexa or Google Assistant. In the Alexa app, go to "Skills & Games" and search for the bulb manufacturer’s skill (e.g., "Philips Hue"). Enable the skill and follow the prompts to link your accounts. In the Google Home app, go to "Add" -> "Set up device" -> "Works with Google" and search for the bulb manufacturer. Similarly, link your accounts and grant the necessary permissions. After linking, the Google Home or Alexa app should automatically discover your new bulbs. You will then be prompted to individually name the bulbs according to their location, like “Living Room Lamp” or “Kitchen Overhead.” Taking the time to name appropriately here is vital for smooth voice control.
Creating Rooms and Groups for Seamless Control
Individual bulb control is fine, but true multi-room lighting shines when you organize bulbs into rooms and groups. In both the Alexa and Google Home apps, you can easily create rooms (e.g., "Living Room," "Bedroom," "Kitchen"). Assign the corresponding bulbs to each room. This allows you to control all the lights in a room with a single command, such as “Alexa, turn off the living room lights.”
Beyond rooms, you can create custom groups. For example, you might create a “Downstairs” group containing lights from the living room, kitchen, and hallway. This is useful for controlling multiple areas simultaneously. The Google Home app allows for even more sophisticated grouping -- grouping lights within rooms -- providing a very granular control. This granularity benefits households where individual lighting preferences vary greatly. Consistency in naming is key; use clear and descriptive names that you’ll easily remember and pronounce.
Building Routines and Automation for Enhanced Convenience
Routines are the heart of a truly smart lighting experience. Both Alexa and Google Assistant allow you to create routines that trigger actions based on specific commands, schedules, or events. For example, you can create a “Good Night” routine that turns off all lights, locks the doors (if you have smart locks), and sets the thermostat to a comfortable sleeping temperature.
To create a routine, open the Alexa or Google Home app and navigate to the "Routines" section. Give your routine a name and then add triggers and actions. Triggers can be voice commands ("Alexa, good night"), scheduled times (“Every day at 10 PM”), or even sensor-based events (e.g., motion detected by a security camera). Actions can include turning lights on/off, setting brightness levels, changing colors, and more. Experiment with different configurations to tailor routines to your lifestyle. A simple “Movie Night” routine could dim the living room lights, turn on a bias lighting strip behind the TV, and even pause your streaming device.
Troubleshooting Common Issues and Maximizing Performance
While smart lighting is generally reliable, occasional hiccups can occur. Common issues include bulbs becoming unresponsive, connection problems, or inconsistencies in voice control. First, ensure your Wi-Fi network is stable. Restarting your router can often resolve connectivity issues. If a bulb is unresponsive, try power-cycling it (turning it off and on).
Check the bulb manufacturer’s app for firmware updates, as these often include bug fixes and performance improvements. If a bulb consistently loses connection, consider its distance from the Wi-Fi router or hub. Consider moving the router closer or adding a Wi-Fi extender. If voice control is unreliable, double-check your naming conventions and ensure the voice assistant can accurately understand your commands. Experiment with different phrasing. Finally, remember that interference from other wireless devices can sometimes disrupt signals. Keeping your smart home devices away from sources of interference (like microwaves or cordless phones) can help improve performance.
Expanding Beyond Basics: Advanced Integrations & Future Trends
Once you've mastered the fundamentals, consider exploring advanced integrations. IFTTT (If This Then That) allows you to connect your smart lighting to a wider range of services and devices. For instance, you could create an applet that turns on your lights when you receive a text message or when the sun sets. Scene-setting using third-party apps can add further layers of sophistication.
Looking ahead, the future of smart lighting is promising. Matter, a new universal connectivity standard, aims to simplify interoperability between devices from different manufacturers. This will eliminate the frustration of compatibility issues and allow you to create a truly unified smart home experience. We can also expect to see increased integration with other smart home systems, more sophisticated automation features, and even personalized lighting based on your circadian rhythm and activity levels.
In conclusion, setting up multi-room voice-controlled lighting is a rewarding experience that adds convenience, ambiance, and security to your home. By carefully selecting the right bulbs and hub, following the setup instructions, and leveraging the power of routines and automation, you can elevate your living space to a new level of smartness. Remember to prioritize compatibility, choose descriptive names, and don’t be afraid to experiment. The investment in a well-integrated smart lighting system will undoubtedly enhance your daily life for years to come. Start small, focus on one room at a time, and build your perfect smart lighting ecosystem gradually.
Deja una respuesta