
Budget-Friendly Ways to Replace Kitchen Cabinet Hardware
Kitchen remodeling often conjures images of exorbitant costs, gutted spaces, and months of disruption. However, a dramatic transformation doesn’t always require a full-scale renovation. One of the most impactful, yet surprisingly affordable, upgrades you can make is replacing your kitchen cabinet hardware. Often overlooked, cabinet knobs, pulls, and hinges play a significant role in the overall aesthetic of your kitchen. Updating them can instantly revitalize the space, making it feel fresh, modern, or charming – all without breaking the bank. This article will guide you through every step of the process, offering practical advice, expert insights, and creative solutions to help you achieve a professional-looking result on a budget.
The beauty of a hardware refresh lies in its accessibility. It’s a DIY project suitable for most homeowners, requiring minimal tools and experience. More than just an aesthetic change, new hardware can also improve the functionality of your cabinets. Sticking or loose handles can be frustrating, and upgrading to higher-quality hardware can address these issues, ensuring smooth operation for years to come. The impact shouldn’t be underestimated; a recent Houzz study revealed that replacing cabinet hardware is consistently ranked among the most cost-effective kitchen updates, offering a high return on investment in terms of both value and visual appeal.
This guide will explore everything from choosing the right hardware styles and materials to the proper installation techniques, and strategies for finding the best deals. We’ll also delve into the often-overlooked details, like screw sizing and hinge replacements, to ensure a polished and professional finish. Whether you’re aiming for a farmhouse chic vibe, sleek contemporary minimalism, or a classic, timeless look, this article will provide the knowledge and confidence to tackle this project and transform your kitchen on a realistic budget.
- Assessing Your Existing Hardware and Defining Your Style
- Budget-Friendly Hardware Sources: Where to Find Great Deals
- Tools and Materials: Preparing for Installation
- Step-by-Step Installation: A Practical Guide
- Addressing Common Challenges and Troubleshooting
- Beyond Knobs and Pulls: Considering Hinge Replacements
- Final Thoughts: A Kitchen Transformed
Assessing Your Existing Hardware and Defining Your Style
Before rushing out to purchase new hardware, it’s essential to take stock of your current setup. Carefully examine the existing knobs and pulls – what style are they? What is the finish? What is the hole spacing (important for pull replacements)? Are the screws stripped or damaged? This assessment will inform your choices and help you avoid costly mistakes. Photographing your existing hardware and the cabinets themselves is a smart move, providing a visual reference as you browse for replacements. Don't just look at the hardware itself; consider how it interacts with the overall kitchen style.
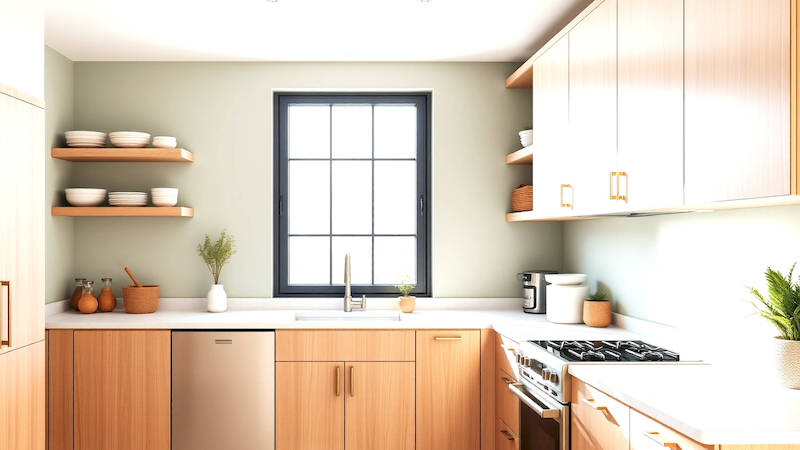
Defining your desired style is the next crucial step. Are you drawn to the rustic warmth of oil-rubbed bronze, the clean lines of brushed nickel, or the timeless elegance of polished chrome? Gathering inspiration from magazines, websites like Pinterest and Houzz, and kitchen showrooms can help narrow down your preferences. Consider the color scheme of your kitchen; hardware should complement, not clash. For instance, warm-toned cabinets often pair beautifully with bronze or antique brass, while cooler-toned cabinets look striking with chrome or stainless steel. Remember, this is a chance to inject your personal style, so don’t be afraid to experiment!
Furthermore, think about the feel you want to create. Larger, bolder pulls can make a statement and are often better suited for larger kitchens or cabinets. Simpler, more understated knobs and pulls work well in smaller spaces, creating a cleaner, less cluttered look. Don't underestimate the power of mixing finishes – a popular trend involves combining brushed nickel pulls with oil-rubbed bronze knobs for a more eclectic and visually interesting design. However, proceed with caution and ensure the combination feels cohesive rather than jarring.
Budget-Friendly Hardware Sources: Where to Find Great Deals
The cost of cabinet hardware can vary dramatically depending on the material, style, and brand. Fortunately, numerous sources offer affordable options without sacrificing quality. Big box stores like Home Depot and Lowe's often have sales and a wide selection, particularly online. However, don’t limit yourself to these retailers. Online marketplaces like Amazon and Wayfair consistently offer competitive pricing and an extensive range of styles. Websites specializing in cabinet hardware, like MyKnobs.com or HandlesandHardware.com, can offer a broader selection but may require more time for shipping.
One of the most effective strategies for saving money is to consider alternative materials. Solid brass, while beautiful and durable, is generally the most expensive option. High-quality stainless steel, zinc alloy, or even ceramic hardware can offer a similar look and feel at a fraction of the cost. Keep an eye out for closeout sales and clearance items, particularly at smaller hardware stores or online. These can yield significant discounts on perfectly good hardware. Thrift stores and architectural salvage yards are also excellent sources for unique, vintage hardware – often at incredibly low prices.
Don’t overlook the possibility of purchasing in bulk. If you have a large kitchen, buying knobs and pulls in bulk from a wholesaler can significantly reduce the per-item cost. Finally, consider the finish. Polished finishes tend to be more expensive than brushed or antique finishes. If you’re on a tight budget, opting for a brushed or antique finish can save you money without compromising on style.
Tools and Materials: Preparing for Installation
Before you begin the installation process, gather your necessary tools and materials. This will ensure a smooth and efficient workflow. You'll need a screwdriver (both Phillips and flathead), a drill with drill bits (for widening holes if necessary – more on that later), a measuring tape, a pencil, a level (to ensure pulls are straight), and possibly a stud finder (if you're dealing with difficult cabinet materials). A soft cloth or painter's tape is also helpful to protect the cabinet surface.
Regarding materials, in addition to the new hardware, you’ll need replacement screws. Often, the screws included with new hardware are either too short or the wrong type for your cabinets. It's wise to purchase a variety pack of cabinet screws in different lengths and gauges. Consider purchasing wood filler and touch-up paint or stain to repair any minor damage to the cabinets from removing the old hardware. It's also a good idea to have some lubricant, like WD-40, on hand to help loosen stubborn screws.
Finally, and this is often overlooked, consider the importance of proper hole spacing. Measure the distance between the screw holes on your existing pulls. New pulls must have the same hole spacing to fit without requiring significant modifications to the cabinet doors, which can be time-consuming and potentially damaging. If the hole spacing doesn't match, you might need to fill the existing holes with wood filler and drill new ones – a more involved process that requires additional tools and skills.
Step-by-Step Installation: A Practical Guide
With everything prepared, you can now begin the installation process. Start by carefully removing the old hardware. Gently unscrew the knobs and pulls, and store the screws in a safe place – you might need them later. If the screws are stripped or damaged, discard them. Use a soft cloth or painter's tape to protect the cabinet surface while removing the hardware, preventing scratches or dents.
Next, clean the cabinet doors and drawers, removing any dirt, grime, or residue from the old hardware. This will ensure the new hardware adheres properly. Now, position the new hardware in the desired location. Use a pencil to mark the screw holes, or use the existing holes as a guide. If the new hardware has different hole spacing, you’ll need to carefully measure and drill new holes, ensuring they are straight and aligned. Drill slowly and use the appropriate drill bit size for the screws. After drilling, apply wood filler to the existing holes, let it dry, sand it smooth, and then paint or stain to match the cabinet finish.
Finally, attach the new hardware using the replacement screws. Tighten the screws firmly, but be careful not to overtighten, which could strip the wood. Use a level to ensure the pulls are straight and evenly spaced. Double-check all the hardware to ensure it’s securely attached and functioning properly.
Addressing Common Challenges and Troubleshooting
Even with careful planning, you may encounter some challenges during the installation process. One common issue is stripped screw holes. If the screws won't tighten, try inserting a small wooden toothpick or matchstick into the hole along with the screw. The wood will provide extra grip. For more severe cases, you may need to use a larger screw or a wood repair kit.
Another potential problem is misalignment. If pulls are crooked, loosen the screws slightly and adjust the position until they are straight. Tighten the screws again. If drilled holes are off, wood filler and repainting may be necessary. Dealing with stubborn screws is also common. Apply a penetrating oil, like WD-40, and let it sit for a few minutes before attempting to unscrew. Gentle tapping with a hammer can also help loosen the screw.
Finally, be prepared for unexpected variations in cabinet construction. Some cabinets may have thinner materials that are more prone to splitting. Drill slowly and use the appropriate drill bit size to minimize the risk of damage. Patience and attention to detail are key to overcoming these challenges and achieving a professional-looking result.
Beyond Knobs and Pulls: Considering Hinge Replacements
While often the focus is on knobs and pulls, replacing cabinet hinges can significantly improve the functionality and appearance of your kitchen. Old or worn hinges can cause doors to sag, stick, or close unevenly. Upgrading to soft-close hinges, for example, offers a luxurious feel and prevents slamming. There are numerous types of hinges available, including concealed hinges (which are hidden from view), traditional face-mount hinges, and self-closing hinges.
Choosing the right hinges requires careful consideration of your cabinet construction and your desired functionality. If you’re unsure which type of hinges to choose, take a sample of your existing hinges to a hardware store for assistance. Installing new hinges typically involves removing the old hinges, aligning the new hinges, and screwing them into place. Be precise with positioning to ensure the doors hang straight and close properly. Remember to use appropriate screws that are the correct length for your cabinet material.
Final Thoughts: A Kitchen Transformed
Replacing your kitchen cabinet hardware is a remarkably effective way to refresh the look and feel of your kitchen without incurring the expense and disruption of a full-scale renovation. By carefully assessing your existing hardware, defining your style, sourcing affordable materials, and following the installation steps outlined in this guide, you can achieve a stunning transformation on a budget.
Remember, the key takeaways are to prioritize planning, invest in quality hardware (even if it’s not the most expensive option), and pay attention to detail during installation. Don’t be afraid to experiment with different styles and finishes to create a kitchen that reflects your personal taste. And finally, don't underestimate the impact of small changes—sometimes, the simplest updates can make the biggest difference. Your kitchen awaits its new look, and with a little effort, you can achieve a professional-quality result that will enhance your home for years to come.
Deja una respuesta