
Creating automated lighting scenes synced with your home entertainment system
The modern home is increasingly becoming a connected ecosystem, blurring the lines between technology and lifestyle. While smart speakers and voice assistants often grab headlines, a truly immersive and enriching home entertainment experience often hinges on a less-discussed, yet profoundly impactful element: automated lighting. No longer simply about illumination, lighting can now dynamically respond to the content on your screen, enhancing emotional impact, reducing eye strain, and fundamentally transforming how you consume media. This article will delve into the intricacies of creating automated lighting scenes that perfectly synchronize with your home entertainment system, offering a comprehensive guide for tech enthusiasts and homeowners seeking to elevate their viewing experiences. From the underlying technologies to practical implementation, we’ll explore how to transform your living room into a cinematic haven.
The potential benefits extend beyond mere aesthetics. Properly integrated lighting can significantly improve clarity and perceived contrast, making colors appear more vibrant and details more discernible. Studies have shown that dynamic lighting that reacts to on-screen action can increase engagement and emotional connection with the content being viewed. Furthermore, a thoughtfully designed system can reduce eye fatigue, crucial for extended movie nights or gaming sessions. The key is moving beyond static brightness levels and embracing a dynamic approach where lighting acts as an extension of the entertainment itself, rather than simply illuminating the room. This approach requires understanding the various components involved and developing a strategy tailored to your specific setup and preferences.
- Understanding the Core Technologies
- Mapping Your Entertainment Space
- Connecting Your System: Hardware and Software Integration
- Building Dynamic Lighting Scenes: A Step-by-Step Guide
- Troubleshooting Common Issues: Latency and Color Accuracy
- Beyond Synchronization: Incorporating Sound and Other Sensors
- Conclusion: Enhancing Your Home Entertainment Ecosystem
Understanding the Core Technologies
The foundation of automated, synchronized lighting lies in a combination of compatible hardware and intelligent software. At the heart of the system are smart lights – bulbs, strips, and fixtures that can be controlled remotely via a network connection, typically Wi-Fi, Zigbee, or Z-Wave. Wi-Fi lights are generally the easiest to set up, directly connecting to your existing network, but can potentially strain bandwidth with numerous devices. Zigbee and Z-Wave require a dedicated hub but offer greater reliability, mesh networking capabilities (extending range), and lower power consumption. Choosing the right protocol depends on the size of your home, the number of devices you plan to integrate, and your existing smart home ecosystem.
Crucially, not all smart lights are created equal. For seamless synchronization, look for lights that offer robust APIs (Application Programming Interfaces) or compatibility with popular home automation platforms like Home Assistant, SmartThings, or Apple HomeKit. These platforms act as central controllers, allowing different devices from various manufacturers to communicate and operate together. Beyond the lights themselves, you'll need a “trigger” – a way to initiate changes in the lighting based on the activity of your entertainment system. This commonly involves a smart remote, a streaming device integration or, increasingly, direct integration with televisions that support open APIs.
Finally, the puzzle is completed with the software component. Dedicated software packages, like Philips Hue Sync, Govee DreamView, or open-source solutions within Home Assistant, analyze the on-screen content and translate it into appropriate lighting commands. These applications vary wildly in their sophistication, with some offering simple color matching and others providing complex algorithms for dynamic scene creation. The choice depends on your technical skill level and desired level of customization.
Mapping Your Entertainment Space
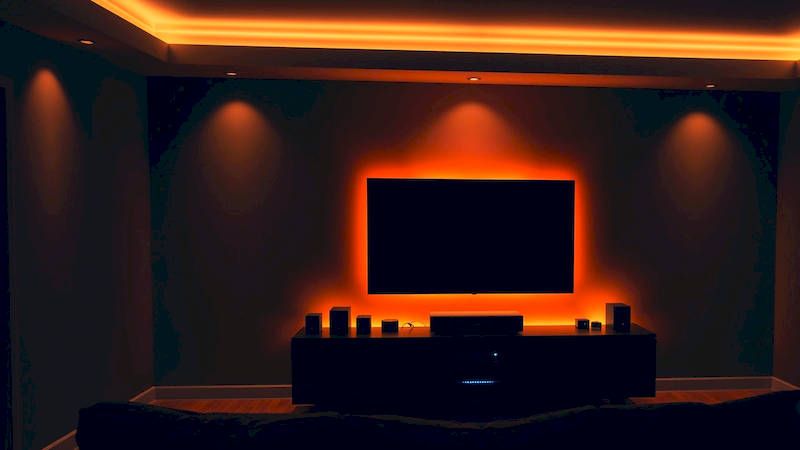
Before diving into the technical setup, taking the time to strategically plan the placement of your smart lights is paramount. Consider the layout of your room, the size of your screen, and the typical viewing angles. The goal is to create an immersive halo effect that extends the perceived boundaries of the screen, drawing viewers deeper into the content. A common approach involves placing LED strips around the perimeter of the television, ideally with a slight gap to prevent light spillover onto the screen itself.
Think beyond the immediate vicinity of the TV. Accenting the room with strategically placed ambient lights can amplify the effect. For instance, lights positioned behind furniture or along the walls can subtly shift colors to complement the prevailing hues on the screen, creating a more cohesive and enveloping experience. A particularly effective technique is to use bias lighting – a soft, diffused light source directly behind the screen – to reduce eye strain and enhance perceived contrast. The color temperature of this light should ideally match the white balance of the screen for the most comfortable viewing experience. Remember to also think about the practical aspects: consider the power supply requirements of your lights and ensure the cables are neatly concealed for a clean and aesthetically pleasing installation.
Connecting Your System: Hardware and Software Integration
With your lights strategically positioned, the next step is connecting them to your entertainment system and automation platform. The precise steps vary depending on the chosen hardware and software. Typically, this involves installing the smart light’s app, connecting the lights to your network, and integrating them with your chosen home automation hub. Within the hub’s interface, you’ll need to create “scenes” that define the desired lighting behavior for different scenarios.
Once the lights are connected, the crucial step is bridging the gap between your entertainment system and the lighting controller. This usually involves installing a dedicated application (like Philips Hue Sync) or configuring custom automations within your home automation hub. The application will analyze the video signal, extract color information, and translate it into commands that control the smart lights. Some systems offer calibration tools to fine-tune the color accuracy and responsiveness, ensuring a seamless synchronization. Experiment with different settings to find what looks best for your specific setup and visual preferences. Don’t be afraid to adjust brightness levels, color saturation, and transition speeds to achieve the desired effect.
Building Dynamic Lighting Scenes: A Step-by-Step Guide
Creating truly engaging scenes requires more than just matching colors to the screen. Explore the advanced features offered by your software platform. Many applications allow you to create custom “rules” that trigger specific lighting changes based on events within the content. For example, you could program the lights to flash red during explosions in an action movie or to dim gradually during a quiet, intimate scene.
Consider these practical examples. For gaming, you might configure the lights to pulse with the rhythm of the in-game music or to change color based on the player’s health level. For movies, you can explore dynamic scenes that mimic the lighting conditions within the film itself – a warm, flickering light for a campfire scene or a cool, blue hue for a nighttime cityscape. Most platforms allow you to save multiple scenes, allowing you to quickly switch between different moods and content types. Experimentation is key. Don't be afraid to try different combinations of colors, brightness levels, and transition effects until you achieve the perfect aesthetic.
Furthermore, explore the possibilities of using conditional logic. Some platforms allow you to define rules that change the lighting based on the time of day, the type of content being played, or even the presence of other smart devices in the room. For instance, you could automatically dim the lights and lower the shades when you start a movie, creating a true cinematic environment.
Troubleshooting Common Issues: Latency and Color Accuracy
Despite the advancements in smart home technology, achieving perfect synchronization isn’t always straightforward. One common issue is latency – a delay between the action on the screen and the corresponding change in the lighting. This can be particularly noticeable during fast-paced scenes and can detract from the immersive experience. Minimizing latency requires optimizing your network connection, using a high-refresh-rate display, and choosing a software platform that prioritizes responsiveness. Zigbee and Z-Wave tend to exhibit lower latency compared to Wi-Fi.
Color accuracy is another potential challenge. The colors displayed on your screen may not always be accurately replicated by the smart lights, due to differences in color gamuts and calibration. Many software platforms offer calibration tools that allow you to fine-tune the color output of the lights to match your screen. Using a colorimeter can further improve accuracy, but this requires more technical expertise. Also, ambient light in the room can affect color perception. Try to minimize external light sources or use lights with a wider color gamut to compensate for these effects. Regular software and firmware updates for all integrated systems are also critical for optimal performance and compatibility.
Beyond Synchronization: Incorporating Sound and Other Sensors
While visual synchronization is the primary focus, consider expanding the system to incorporate other sensory inputs. Some advanced platforms allow you to integrate with sound systems and create lighting scenes that react to the audio track. For example, you could program the lights to pulse with the bass or to change color based on the instrument being played. Integrating with motion sensors can add another layer of interactivity. For example, you could brighten the lights automatically when someone enters the room or create a "welcome home" scene that turns on the lights and starts playing your favorite music.
Looking further ahead, the integration of environmental sensors – like temperature and humidity sensors – could open up exciting possibilities. Imagine a system that automatically adjusts the lighting based on the room’s temperature, creating a warmer ambiance during colder months and a cooler ambiance during warmer months. The possibilities are truly endless, bounded only by imagination and technological innovation.
Conclusion: Enhancing Your Home Entertainment Ecosystem
Creating automated lighting scenes synced with your home entertainment system is a transformative step towards a truly immersive and engaging viewing experience. It’s an investment that extends beyond aesthetics, offering benefits such as reduced eye strain, increased emotional connection, and a fundamentally improved overall experience. Successful implementation requires a careful selection of compatible hardware, strategic planning of light placement, and a willingness to experiment with different settings and configurations.
Key takeaways include the importance of researching the various smart lighting protocols (Wi-Fi, Zigbee, Z-Wave), understanding the capabilities of different home automation platforms, and prioritizing responsiveness and color accuracy. Remember that the goal is not simply to replicate the colors on the screen but to enhance the overall viewing experience by creating a dynamic and immersive environment. Start small, experiment, and iterate – the best lighting scenes are those that are tailored to your specific preferences and lifestyle. By embracing this technology, you can transform your living room into a cinematic haven, blurring the lines between entertainment and reality.
Deja una respuesta